On this page you can, among other things, search for and archive machines and sampling points. You can also create machines and components for sampling, if you have been given the rights to do so.
The screen is divided into 3 panels. When you first arrive here, you will see that the page is empty and that the "Add Selection to Sample Registration" button is inactive. To proceed, you must select a group under "Groups" on the left-hand side.

With reference to the red numbers:
- Search field - Here you can search for machines and sampling points
- "Add Selection to Sample Registration" - Here you can add the selected sampling points to pre-registration
- Groups - A list of the groups of machines your account has access to
- Machines / Units - A list of machines linked to the group you have selected
- Sampling points "Components" - A list of sampling points linked to the machine in (4)
In the search field, matches for both machines and sampling points appear continuously. If you select one of them, the accompanying data is shown in the overview. Note that you need at least three characters to search.


To be able to use the "Add Selection to Sample Registration" button, i.e. select samples for pre-registration, you must first select a machine and component. If the component is already registered for a sample, you will be notified.

Group selection. If you have several groups of machines, they will appear here. Choose which group you want to view machines for, and the list of machines will update.
In the machine panel you will see information about the machines registered in the database. Here you can see which sampling points are linked to each machine by pressing "View". If you choose "Archive", it will be deleted (and disappear from the system!).
If you choose to archive, a confirmation window will appear, to make sure this is really what you want.

Under the component list you will see a list of the sampling points registered in the database, under the selected machine. "View" will take you to a new window listing all analysed samples, while "Archive" will delete the component.
Here you can also set a sampling interval (in months) if relevant, and you get a quick overview of whether the sampling interval has been exceeded, in addition to the status of the last sample.
The system is built in such a way that each machine has one or more components. Each component can be sampled. Examples of components for an excavator could be hydraulics, engine, transmission, etc.
To create new machines and components for sampling, do the following:

- Select the group the new component should belong to.
- Click < New Machine >
If the < New Machine > button is not visible, this is because you have not been given administrator access. Contact support@invicta.no to have this activated.

< New Machine > opens a new dialog box where you fill in the necessary information.
When the information has been filled in, click < Save And Add New Component >

This opens a new dialog box for filling in information for additional components.
If there is only one component, click < Save and Add Sample For This Component >.
If several components are to be registered, click < Save >.

When the machine and components have been added, it will look like this.
- Click < View > to bring up the components that have been created.
- Click < New Component > to add more components.
- Select the components to be sampled.
- Click < Add Selection to Sample Registration > if this has not already been done in the < New Component> dialog box.
- The machine and components will now appear under the < Sample Registration> tab.

In the < Sample Registration > tab you can make final changes and add notes before printing labels with a QR code.
Important: Replace the generated Tracking Number with the QR code of the bottle if you are not using a Dymo label printer.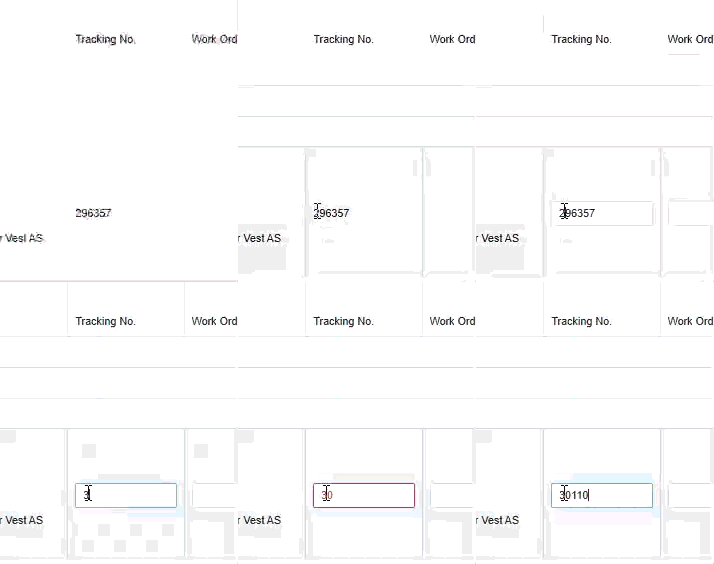
Other fields and options:
Work order: A number that follows the sample on the report and invoice
Purchase order: Purchase order number for the invoice
Sample date
Fluid: Here you select the oil type, which is stored in the system for future samples.
The next fields (all of which are important) are machine hours, fluid/oil hours (hours or km), fluid topped up, oil changed, filter changed (at sampling).
Reason and Remarks are messages you want to include with the sample
You edit the texts by clicking the field to type
Dymo label printer or PDF for A4 printing: If a Dymo printer is installed and operational, you will have two green marks at the bottom and the name of the connected printer. If there is an error in the installation, there will be yellow marks with the text NO. If the Dymo printer fails, only PDF will be available.
Component Detail
Here you will find details about the component registered in the system. To get here, select "View" on one of the components.
You will also see whether the sampling interval has been exceeded, indicated by the small red flag marked "overdue". That means it is time to take a new sample. Information about which group or machine this sampling point belongs to is also shown here.
On the right-hand side, from the top, there are several functions that can be used: "+ Add To Sample Registration" (add a pre-registration for this sampling point), "Trend Charts" (view graphs/trends), and "Export Data" (export raw data).
With reference to the red numbers:
- Details - Information about the sampling point and oil type
- Recent Samples - A table of the latest samples taken from this component
- Additional function buttons
(1) Details about the sampling point, group, machine and more, as well as the last sample date. Information about the oil in use.
(2) The latest samples are listed for this component, including sample number, tracking number, status and diagnosis comments.
(3) "+Add Sample To Sample Registration" will add a sample for this component under the "Sample Registration" page. If a sample has already been registered for this component, you will be notified.
"Trend Charts" will open a new window where you can visually choose to view graphs of analysed values.
"Export Data" gives you raw data (CSV) with analysis values for this component.
Editing existing machines and components
The Machine and Component sections both have a column called Edit.
If you select Edit, you can edit information about an existing machine or component.
The Archive button deletes the machine or component.